Sunday, August 29, 2010

OMG! We have been so bad at updating!


Summer has been busy and lazy at the same time, and we've been enjoying tons of juicy peaches, cold sorbet, refreshing iced tea and looooong Sunday brunches. Updates very soon.


Monday, May 31, 2010

Strawberry and mint infused syrup

AND... Were back! After a bit of a hiatus, O.M.G food is back with a vengeance. We were in boxes for a while, and then we moved, and then we had to find the camera, and then we had to actually unpack, and then we FINALLY started to cook again. PHEW! I think our friend Jill over at Hey That Tastes Good, was in a similar situation.

This past weekend was a beautiful one! We started our Saturday bright and early and the Ft. Greene Farmer's Market. We picked up some pursulane (blog post to come), eggs, rhubarb, bok choy, beets, mint and strawberries. Everything was so beautiful and we wanted to take all of the veggies home with us, but we ran out of room in the bag. So after a delightful brunch at Rice, we went home with our treats. J and I discussed the evenings plans and decided that we should make some type of fruity infused syrup for the vodka we would be blurring our good sense with. We decided that a strawberry mint infused syrup would go well with a vodka soda lime drink. The strawberries were warm from the sun and bursting with juicy goodness, and the mint was earthy and refreshing.


First, I boiled some some water and put the bundle of mint in the water for it to steep. After the water boiled and the mint turned the water a hazy shade of yellow, I added sugar (we had some white sugar, shhhhhhhhhhhhhhhhhh, that we HAD to get rid of so I used it).


Next, I removed the mint from the infusion, threw it in the compost, and moved on to the berries. I removed the tops, and gave them a good rinse, and then I gave the berries hell. I squashed the crap out of those bad berry babies. I squeezed them over a bowl until they begged for mercy. Did I show them who was boss? I sure did, because after squashing them to a jam like pulp, I transfered them into the hot, minty, sugary bath. It was more of a mint jacuzzi for the berries at this point, so I would consider them lucky.


This mixture of chunky strawberry pulp and mint syrup was so delicious, I would really like to experiment with popsicles. You could throw this mix into popsicle molds and freeze them for a sweet, minty summer treat.


I put the strawberry infusion into the fridge to cool, that took about 40 minutes, and then I strained the syrup. The results were astonishing! I had never made a fruit infused syrup, but the first time around yielded delicious delights! The syrup was minty and had the strawberry flavor that old tyme strawberry candies have.


As planned, we mixed the syrup with vodka, seltzer and a zesty lime wedge. Think about how much effort muddling mint for a mojito takes, and then think of how easy breezy lime squeezy this cocktail is... The cocktail was like a sweet strawberry breeze. After two cocktails, I really felt like I was in a hammock. Next time I will use raw sugar, and double the amount of sugar used so the results are more concentrated.


You'll need:
-- 1 bunch of fresh mint
-- 1 quart of fresh strawberries. Snobbery aside, you really should use farm fresh berries, the ones that are literally still warm from the sun and soft enough to mush pretty effortlessly. Store bought, out of season berries are way too hard and tasteless. Trust us on this one.
-- 1 1/2 cup sugar (really should be more like 3 cups to make a syrup)
-- 1 1/2 cups water

Process:
1. Add water, sugar and mint to saucepan and boil.
2. Remove from heat and let mixture steep until water turns amber, approx. 40 min.
3. Mash strawberries
4. Strain mint mixture into large bowl
5. Add mashed berries and stir
6. Let mint/strawberry mix sit and cool. Stick in freezer if you wish.
7. Store in airtight jar or container until ready to use.


How much of the mixture you should use in your cocktail will depend on the sweetness and concentration. If it is more like a juice (as this was), you'll have to use a good amount. If it's more of a syrup, add only a little bit or you'll be in headache city after one cocktail.

ENJOY!

--R

(Photos by J)

Friday, April 9, 2010

Donut Tour 2010


I realize I haven’t updated in a while. Things have been in flux here in Brooklyn. R and I are moving out of our apartment, which is exciting since our neighborhood was less than ideal, but also quite stressful as we try to pack in as many apartment visits as possible before the end of the month. We haven’t been grocery shopping in eons, and Passover was last week, which meant no leavened bread, so we’ve been eating peanut butter and parve Nutella on matzoh for the better part of two weeks. Yikes!

This weekend, nothing would make me happier than heading up to Northampton, MA to visit my friends and embark on a very special journey called Donut Tour 2010. Instead, I’ll be drowning in piles of work and searching for apartments, but I have a tremendous amount of faith that this first ever event will NOT be the last. I am already anticipating varied forms of the tour in 2011, 2012 and beyond. Maybe in New York next year? Brooklyn, of course? I am getting ahead of myself. Let’s start with the facts.

It’s no secret that my friends are geniuses. It’s also no secret that OMG Food is passionate about good ideas and good food, which is why this blog is the perfect space to detail this incredible journey.

Please see the official press release below:

DONUT TOUR 2010 TO HIT THE VALLEY THIS SATURDAY

On Saturday, April 10, over thirty residents of the Pioneer Valley will participate in a six-stop "Donut Tour," driving to multiple donut shops throughout the valley and sampling donuts at each location.

Participants in "Donut Tour 2010" will meet at 81 Bridge Street in Northampton at 10:00am and don screen-printed t-shirts, buttons, and signs all made for the occasion. They will each be given a map of the chosen locations, comment cards to fill out for each stop, and a custom-made "Donut Tour Mix" CD consisting solely of songs that have to do with donuts.

The Tour's first stop is the Donut Man in Hadley. Other stops include the North Hadley Sugar Shack, Atkins Farms and Henions Bakery in Amherst, Sunrise Pastry Shop in Easthampton, and the Donut Dip in West Springfield. At the Donut Dip, participants will be greeted with a top-secret "Donut Surprise."

"Donut Tour 2010" was conceived by Elena Lavarreda, an '08 Smith alum and Valley native, who recruited friends to help with the planning. "I just got to thinking about how many great donut shops there are in the valley that my friends and I never get to experience," she says. "I wanted to change that."

Paige Hendry-Bodnar, an '09 Smith alum and fellow organizer, concurs: "This is a great way to support local businesses and build community. People of all ages are set to attend the Tour, which is exciting. But mostly, I am excited about eating DONUTS."

To break down the journey a little further:
Donut enthusiasts will meet at 10am sharp and caravan north to their first stop,
Donut Man in Hadley, MA where they will enjoy the famous buttermilk and sour cream donuts.

Next, they’ll continue to North Hadley and won’t stop till they reach the
North Hadley Sugar Shack to feast upon maple cream donuts.

Arriving in Amherst, the caravan will unload at
Henion Bakery and ask for jelly donuts made with raspberry jam.


Most donut tour members will be familiar with the next stop,
Atkins Farms, where many Smithies have spent glorious Mountain Days with classmates picking apples, sipping cider and eating the Farm’s world famous cider donuts.


Perhaps after a short break and some stretches after 4 donut locations, donuteers will continue to Easthampton to
Sunrise Bakery for some good ole’ fashion donuts.


And finally, if the anticipation isn’t killing you yet, the last and final stop is:
Donut Dip in West Springfield where guests will enjoy a surprise donut! What could it be? What do they have up their sleeves? We’ll all have to wait to find out.

But what about vegans like me? Will they be left out? Of course not. The Donut tour event planners take this work very seriously and want this experience to appeal to all walks of life, which is why vegan donuts will be offered throughout the journey.

Want to hear more? The Donut Tour team will be blogging about the experience, tweeting up a storm and voting for their favorite donuts. Check out their
destination map and twitter updates.

--J


Thursday, March 25, 2010

I'm on a tea kick. I've been trying to drink less coffee and more tea, and so far it has been a pleasant journey. I bought loose leaves at Kalustyan's in "curry hill" recently, which is a lot cheaper than buying bagged tea, it seems.

Photobucket

Lately, it has been HOT in our apartment and I've been really into making big batches of iced tea and sweeting it with a little bit of honey OR the infused simple syrup we made a trillion years ago for NYE (recipe to follow). This sweetener is perfect, actually, because you don't need to use a lot and it is spicy and perfect for tea!

Photobucket

I am impatient, so waiting for the tea to cool is the hardest part. I usually brew some in the morning, stick it in the freezer, go for a run, and when I come back, I can enjoy some refreshing, cold tea. Yum!

Photobucket

I recently discovered this great place called Tea Spot in Greenwich village on Macdougal street, but while looking it up online, I clicked on the wrong link and came across a blog with the
same name which is pretty cool. Anyway, the REAL Tea Spot has so so so many teas and plenty of seating for the work-from-home/coffee shop/library gal like me. There are also some NYU students here and there, and people on awkward dates. Perfect.

Photobucket

Maybe I'm not searching hard enough, but I have to say, it has been hard to find some decent, cozy coffee shops in NYC. I know that sounds absurd, but unless I feel like shelling out $20 for lunch, coffee, tea and snacks to earn my electric socket and "free" WiFi, there aren't a ton of welcoming study places. It certainly makes me miss the
Haymarket in Northampton and of course, the one and only Bookmill.

Photobucket

Saturday, March 6, 2010

Granola bars, sort of

I was on a granola bar kick for a while, because I needed healthy, portable snacks. I wanted to mix things up by adding some (dairy free) chocolate chips, so I looked up recipes and came across a few. Don't laugh, but I used a combination of Rachel Ray's "No Bake Chewy Granola Bar" recipe and some other food blogger recipes. Rachel's recipe calls for rice crispy cereal. I used a gluten free, brown rice cereal instead. I used 1/4 cup brown sugar instead of 1/2 (I used extra honey). I also added peanuts to make up for the other ingredients I was missing. I didn't have raisins or granola, so my bars fell apart a little, but were still the perfect combination of salty and sweet.


Photobucket

Ingredients:
4 tablespoons (1/2 stick) unsalted butter (I used Earth Balance)
1/2 cup packed light brown sugar
1/4 cup honey
2 cups granola,
1 cup rice cereal
1/2 cup raisins
1/2 cup thin pretzel sticks
1/2 cup semisweet chocolate chips
1/4 cup peanuts


Photobucket

Process:
1. In a medium saucepan, combine the brown sugar with the honey and butter. Bring the mixture to a boil over medium-high heat, then lower the heat to medium-low and simmer until the sugar dissolves, about 2 minutes. Remove the saucepan from the heat.
2. Add the granola, rice cereal, raisins and pretzels to the saucepan and fold the ingredients to evenly coat with the sauce. Transfer the granola mixture to a 9-by-13-inch ungreased baking pan and press firmly to evenly fill. Gently press the chocolate chips onto the top of the granola. Let the granola mixture set in the refrigerator until firm, about 15 minutes, then cut into 2 1/4-by 3-inch bars.

Photobucket

Friday, March 5, 2010

Whole Grain No Knead Bread

Photobucket

I used the same recipe for the white no knead bread to make a whole grain version. I used 2 cups of unbleached (white) wheat flour and then used rye, whole wheat and brown rice flour as well as seeds (flax, sesame, poppy) to make up the remaining 3.5 cups. The dough was pretty sticky for some reason, and I had to add more and more flour to fix that. Next time, I should use more white flour from the start.

Photobucket

I made two versions--one slow rising dough (Bittman's. It takes 12 hours to rise, omg) and the quick rise dough from before. I sprinkled seeds directly on top of the quick rising bread, which made it even more delicious. BUT, I forgot to put corn meal on the bottom of the pot, so it stuck and then broke. sad. Trial and error.

Photobucket

Friday, February 26, 2010

veggie stock update

Photobucket

We consulted our chef neighbors about veggie stock. As it turns out, you should only cook vegetable stock for 45 min., not a couple of hours. Chicken or other meat broths should cook longer so that the bones soften, but vegetable broth does not take nearly as long. Oops.

--J

Cous Cous on the Loose Loose

Couscous (pronounced /ˈkʊskʊs/ or /ˈkuːskuːs/)

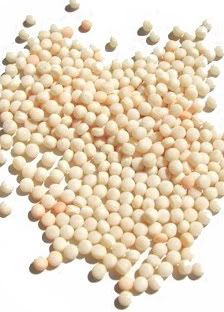
So many grains so little time. I grew up eating couscous. Couscous with pistachios, couscous with apricots, couscous alongside asparagus and grilled salmon. I still love this grain dearly, but have to say I prefer the nutty, protein rich quinoa over couscous, unless were talking about Israeli couscous. Im sure many people are aware that couscous has it's roots in Moroccan cooking, and feels very much at home in a tagine with roasted veggies. In Libya, Morocco, Algeria, and Tunisia, couscous is generally served with carrots, potatoes, turnips, etc.. cooked in a spicy or mild broth or stew but, I am here to introduce you to a different type of couscous... Israeli couscous. Israeli couscous is a small, round semolina pasta that should not be confused with the tiny, yellow North African couscous. Sometimes called pearl couscous or maftoul, it resembles the pasta shape ancini pepe or as my Bubee calls them "bebbles".

Photobucket

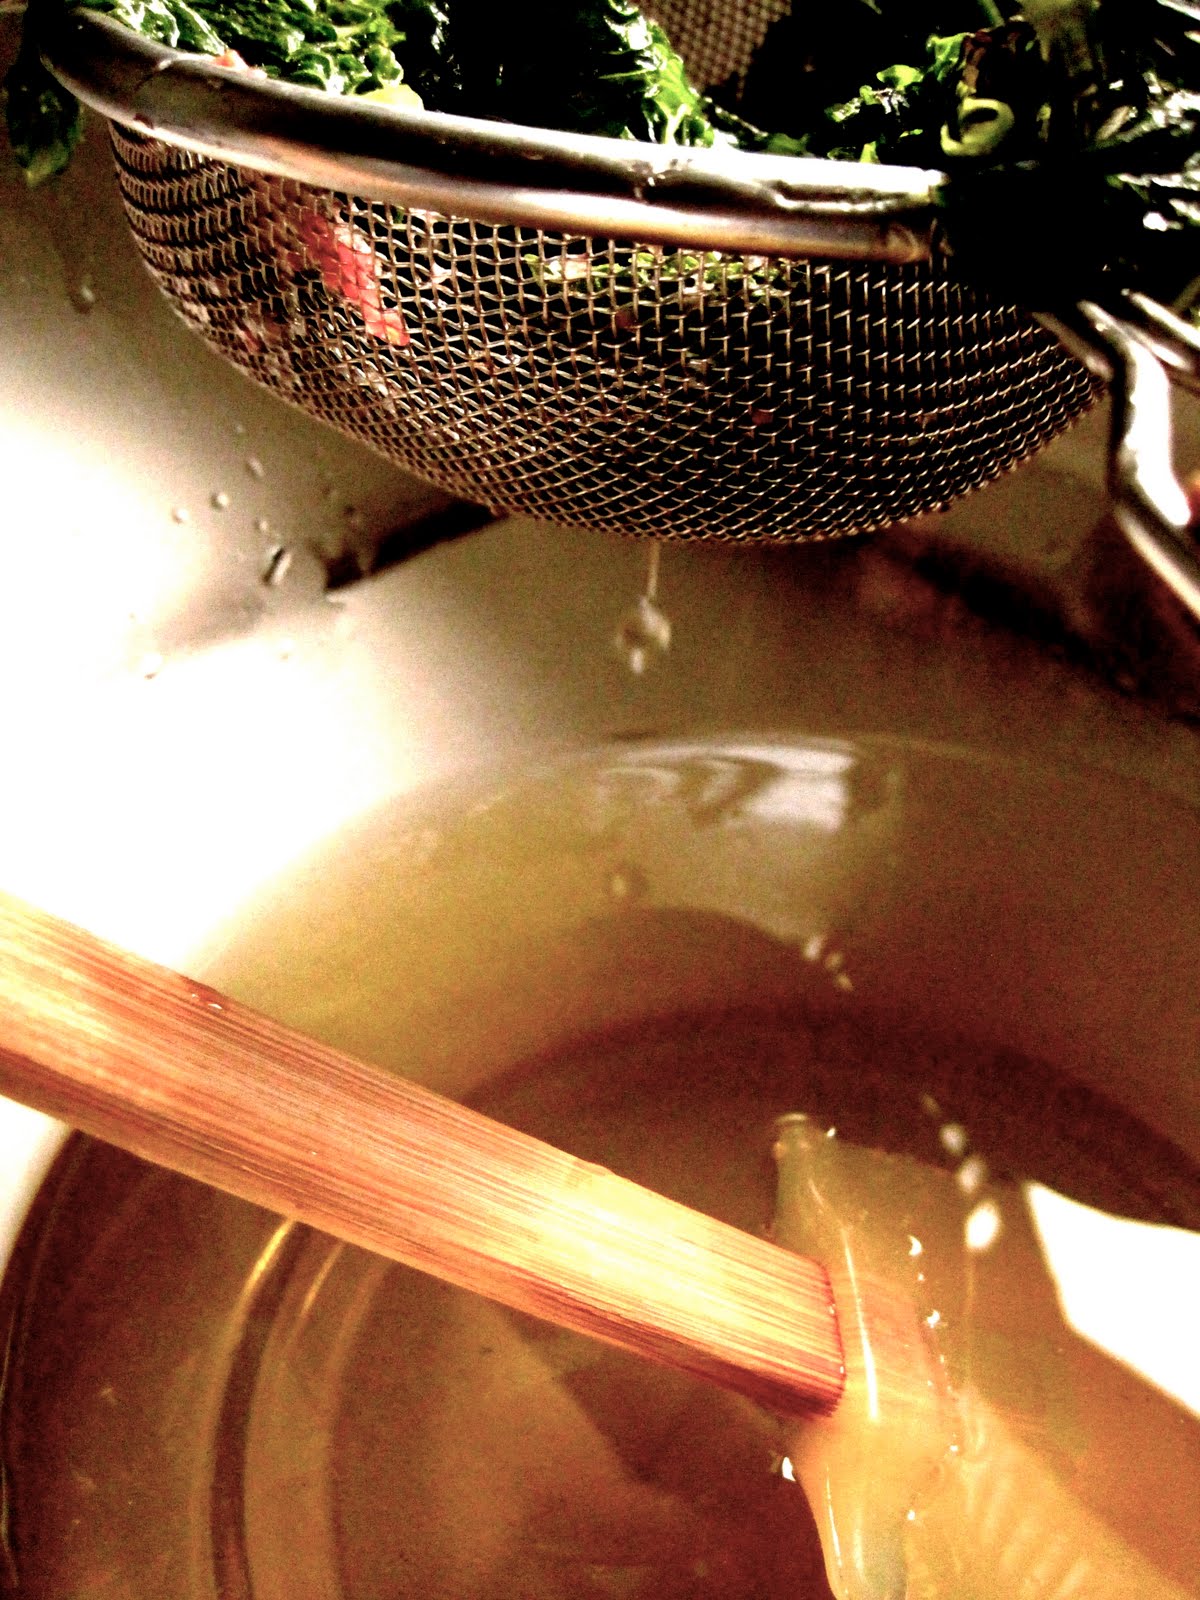
We have been cooking with bebbles a lot lately! Yesterday, I got home from work early because of the 2nd monster blizzard to hit Brooklyn. We had some beets and sweet potatoes that J roasted on Tuesday, and they needed to be consumed. I had some dandelion greens in the fridge that were begging to be sauteed with garlic and oilve oil. So, with all these ingredients I weighed my options... I reached to a mason jar that contained a scant 1/2 cup of Israeli couscous and put it on the stove to cook. I cook Israeli couscous like I cook pasta, boil till tender and then drain. While the bebbles were cooking, I chopped some garlic and sauteed the dandelion greens and added the beets and sweet potatoes. Once the couscous was cooked, I added it to the veggie mix and here is what happened
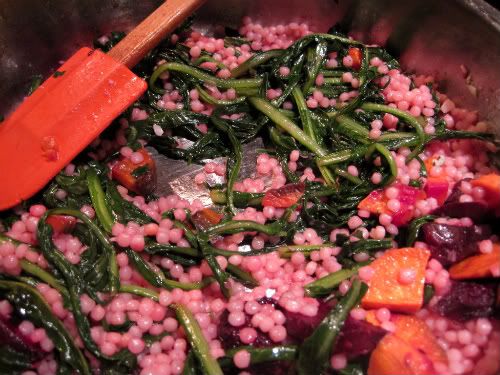
Photobucket

My couscous turned PINK I had a feeling that would happen... These babies tend to have a tendency to make a dish blush
Photobucket

The following is my recipe for Bubbee's Blushing Bebbles or if you're into the whole brevity thing, COUSCOUS. The food so nice they named it twice.

Ingredients

1/2 cup of Israeli couscous (we get ours in bulk at Fairway)
1 clove of garlic, chopped
1 bunch or organic dandelion greens
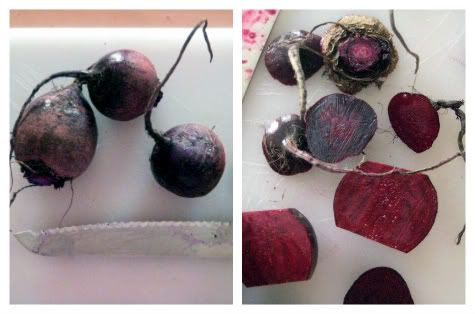
1/2 cup roasted red beets
1/2 roasted sweet potatoes
Olive oil for sauteeing

Methodology

In a pot, boil water as you would for pasta (about 1 1/2 cups on high heat). Add the couscous and boil till tender. While the water is heating up, chop your clove of garlic, wash and cut he dandelions greens, and heat up a skillet with enough olive oil to sautee the greens. Once the skillet is hot, add the garlic, stir until fragrant and add the greens. Sautee the greens until the wilt but retain their bright green color. At this point the couscous should be done, if it isn't be patient, twiddle your fingers, water the plants... Ok ok, add the beets and potatoes to the greens and warm them up bit using the residual heat from the greens. Once your couscous is tender, drain it. Add the couscous to the greens, beets, and sweet potatoes and mix it all together on low heat. The couscous will turn pink.

Photobucket

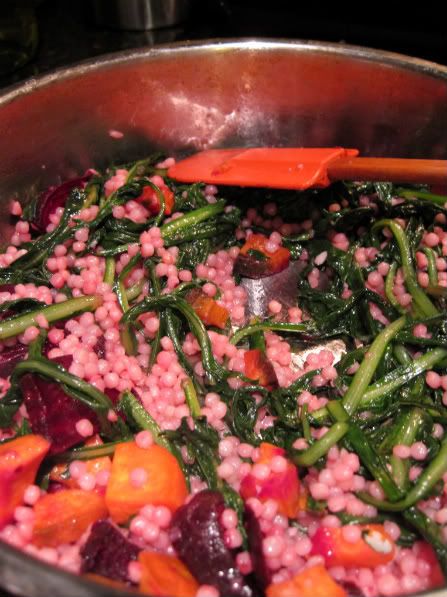
Serve immediately and enjoy!

-R.

Tuesday, February 16, 2010

Veggie stock

To make good soup, you generally need good stock. We've used boxed veggie stock plenty of times, but it gets expensive and usually isn't as delicious. Making stock is really easy and it's a great way to get rid of old veggies. We made this stock on a blizzardly Sunday . Not only were we able to use this to make delicious minestrone soup, we cleaned out the fridge by using tons of random veggies!

Photobucket

You can use nearly any vegetable. We used mushrooms, carrots, carrot greens, celery, leeks, green beans, fresh herbs (dill, rosemary) onions, and some beets, which gave it a dark, reddish color.

Photobucket

I don't generally follow a recipe for stock. I used 15-17 cups of water for this stock, and as many veggies as possible. Just use more water than veggies.

Photobucket

Cook for a few hours. Strain. Store. And use to make soup for the week.

Photobucket

Photobucket

Photobucket

Photobucket

No knead bread

I really want to learn to bake delicious bread. I stayed on campus one summer, sans meal-plan, and lived in a house with someone who made bread every Sunday so she could have sandwiches every day. Was I jealous? Of course. Did I try to learn? No. I saw the yeast and her intense kneading techniques and got freaked out. I could not imagine waiting for dough to rise for hours—I was a busy lady!

No knead bread has become all the rage. Mark Bittman wrote a
NEW YORK TIMES article about it in 2006 and countless food bloggers have detailed their experiences. I found this recipe at HONEY AND JAM and she followed a recipe from IVORY HUT. All of their loaves look incredible—brown, crusty, delicious. My first attempt was decent. I probably should have baked it longer—it got crusty, but not terribly brown. There is always next time. All-in-all, this was very easy. I mixed the dough together and let it set while I was at work, at which point R came home from work and helped with the next steps. Team work!

Photobucket

Photobucket

Photobucket

Photobucket

Photobucket

Photobucket

Photobucket

Photobucket

Photobucket

Photobucket

Ingredients:
3 cups of lukewarm water
1 1/2 tablespoons active dry yeast
1 1/2 tablespoons coarse salt

6 1/2 cups all-purpose flour

Process:
--Mix water, yeast and salt in large mixing bowl. Let this sit for a little while, then add flour and mix with a wooden spoon until combined. You do not need to knead this (duh), but I mixed it a bit with my hands and shaped it a bit.
--Leave this dough covered (but not airtight—I made that mistake and it popped open) for a few hours. I left mine for about 4 hours. When it has risen, the dough can be used or stored in the fridge. I baked half and saved the other half for pizza (omg, yes! Pizza dough! So many options!).
--Take a chunk of the dough, about the size of a grapefruit and gently pull sides down to the bottom, rotating until it becomes round and smooth. Let sit for 40 min uncovered. Next, dust some flour on the loaf and slit the top.
-- Twenty minutes before baking, put cast iron skillet or pizza stone in the middle rack and put a broiler pan underneath. I don’t have a cast iron skillet or pizza stone, so I used a cast iron pot with a lid. Preheat oven to 450.
--Slide loaf into pot and pour 1 cup of hot water into the broiler pan. Put lid on pot and shut the oven door to keep steam inside. Bake for 30-40 min until brown and crusty, remove and let cool.

I'm actually not a huge fan of white bread, country white bread, french white bread, whatever. As I mentioned, this was my first attempt, so I didn't want to mess around with the recipe too much. Now that I know I can make bread, I am going to experiment with different grains. I know you are excited.

--J

Monday, February 15, 2010

Thursday, February 11, 2010

An Old Favorite:

Tomato Soup and Bee El Tees

Photobucket

Back in the days of old, when the dinosaurs roamed the earth, wayyyyyy back when I was first wooing J, we hade a night of ol fashioned goodness. Goodness that can only be found in the depths of a bowl of homemade tomato soup. Campbell's you can kiss my tuchus. I do believe the night we made this delicious dinner it was snowing, it was mid January, and we were full swing of our love affair with Sex and the City. What better way to keep warm and aware of the next Jimmy Choo? Tomato soup and Bee El Tees with avocado.

Photobucket

The soup itself is simple. The hardest element in making this soup is avoiding the urge to put garlic and onion in it because if you do... you end up with tomato sauce and at that point you should just throw on a pot of water and boil up some pasta, chump. The soup gets it's delicious earthy and tangy flavor from the melting of sauteed leeks and fire roasted tomatoes. Do I hear wedding bells? You will need some veggie stock for this soup and if you don't make your own than I suppose a box version will do.

Photobucket

Tomato Soup

1 28oz can of Muir Glen Organic Fire Roasted whole tomatoes
1 8oz can of Muir Glen tomato sauce
1 bunch of leeks (tops cut off) chopped into small pieces
2 cups of veggie stock
Butter for sauteeing (about a pat)
1/2 cup heavy cream *

Heat up a good size pat of butter in a dutch oven on med-high heat. My Le Creuset is 3 1/2 qts so anything that size or larger will be sufficient. To that butter add the leeks and sautee until the leeks get transparent and fragrant. Add the can of tomatoes and the tomato sauce and stir. Toss in a pinch or two of salt and pepper. You will cook this concoction till the whole tomatoes break down. At this point you have the base for your soup. Transfer the soup into the food processor or blender and add a cup of veggie stock to achieve a soup constistency. The tomato mixture resembles a thick chunky mama sauce and that's not what were aiming for. Once you have reached a full bodied soup consistency transfer your soup back into the dutch oven. Heat on low, and right before serving add 1/4 cup of cream to your soup. Stir and serve. *soy milk can be substituted for a vegan rendition.


Photobucket

My infatuation with sandwiches started when I was young. I'm not afraid to tell the world that my mom packed me a brown bag lunch until I graduated high school. Everyday, I had a sandwich, a veggie, a fruit and a juice box. My sammies were usually a p.b. & j, back when you could eat peanut butter in public schools without the child sitting next to you going into anaphylactic shock (no disrespect to the allergy prone) or a cheese sandwich with spicy brown mustard on jewish rye (raise up your cup, mazel tov). Fast forward future, I still love sandwiches, they're easily my favorite food. There are many haters in the world who don't think that a vegetarian sandwich can be any good, and to that we at O.M.G Food say "STFU". Over at Eat to Blog, they have an incredible vegetarian banh mi recipe. Here is our recipe for a Bee El Tee with Avocado.


Bee El Tees with Avocado

*We substituted traditional bacon with Tempeh Fakin. That's something to squeel about.

The recipe is for one sandwich so double the amounts if you're entertaining or just damn hungry!

4 strips of tempeh fakin (Bee)
3 pieces of red leaf lettuce (El)
4 cherry tomatoes (Tee)
1/2 of a ripe avocado (save the pit for planting)
1 tbls of
home-made mayo
2 pieces of crusty multi-grain bread

In a grill-pan, heat up a tblsp of olive oil and grill the tempeh. While the tempeh is grilling, slice the tomatoes, and prep your lettuce (shred or not to shred, that is the question). Slice and remove the pit from your avocado, set other half aside. Cut the avocado into strips.

Photobucket

Toast your bread at this point, and don't forget to flip your tempeh strips so both sides get crispy and brown. Whip up the mayo, or just dive into the jar that sits in your fridge. Once your bread is toasty, schmear it with some mayo, lay down the avocado, the tomato slices, the lettuce and the tempeh, finish with the other slice of toast, and cut in half. Serve with the tomato soup and dunk like #23.

Photobucket


--R